To create and export a script for the COBRA firing system, please follow these three steps:
- Address the show (“Addressing > Address show”).
- Export the script to a USB thumb drive (“File > Export > Export firing system script file…“).
- Load the script by inserting the USB thumb drive into the 18R2 remote.
Step 2 creates the script file, which is a standard format CSV file with a “CSV” extension. The file format details are described below in this section.
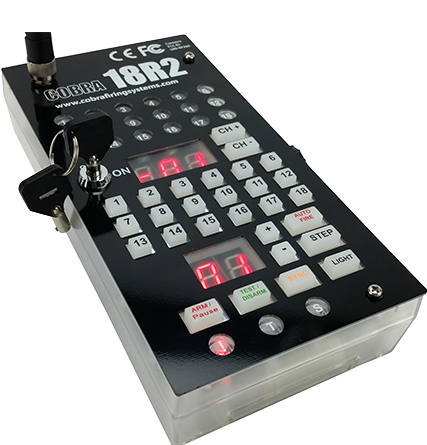
Figure 1 – Cobra firing system
Cobra modules have 6, 18, 36, or 72 pins (cues), but as far as addresses are concerned the modules with more than 18 pins are just two or four 18-pin modules combined, with each of the 18-pin modules having a separately assignable module number (channel number). If you use 36 or 72 pin modules, simply treat them as multiple 18-pin modules stuck together, and assign their separate module numbers to whatever is needed at their physical locations. If you use 6-pin modules, take care to avoid assigning pins above 6 or create a custom module with a 6-pin limit.
Table 1 – File format and encoding
| File format | Extension | Text encoding | Field delimiter | End-of-line |
|---|---|---|---|---|
| Text | .csv | ASCII | Comma | CRLF |
The script contains rows for the firing events, i.e., unique combinations of module, pin, and ignition-time. Multiple effects can be combined on a single cue. The special characteristics of the script are shown in the following table:
Table 2 – Special characteristics
| Special characteristics | Description |
|---|---|
| Script formats for different Cobra firmware versions | Finale 3D can export script files formatted for the following COBRA firmware versions: v3.X v4.X, v5.0.X v5.1.X v6.X v7.0 v7.2 and later COBRA v3.0 and v4.0 scripts have 1/10th of a second resolution; later versions have 1/100th of a second resolution. Beginning with COBRA v6.0, the script supports launch position coordinates, definable pulse time and embedded part numbers. COBRA v7.0 scripts introduce track labels (see below), disable groups (see below). COBRA v7.2 scripts introduce the “DMX Ramp-From Value” field (see below). |
| What rows represent | Rows represent firing events, i.e., unique module-pin-ignition-time events. If multiple effects are triggered on the same cue, the effects are combined in name field, but the row is still just one row. |
| Sort order of rows | Event rows in each section of the script are sorted ascending first by Event Time. |
| Script comments | Empty cues in Finale 3D that have text in the Note field are included in exported Cobra scripts as script comment rows. The format of the script comment rows for Version 6 or later includes the Event Time field and the Name field only, as shown in the middle line of this example:
Script comment rows for Version 5 and earlier are simply pound-sign comment rows, as in: Script comment rows in the Version 6 format will appear in Cobra Show Creator and in the Cobra Control Panel. |
| Special characters | To avoid the need for an escaping convention, Finale 3D filters out comma, semicolon, double-quote, backslash, and all control characters from the exported script. The Cobra controller implements the Excel escaping convention, but Finale 3D filters the characters anyway to avoid types of errors that are common when users import and export from Excel and text editors. |
| Types of scripts | Cobra firing systems support four types of scripts for different firing methods, which you can select from the Export Options dialog when exporting a script:
1) “Separate Scripts By Tracks” The Standard Script method is a single script that executes as a complete show when initiated or when sequenced with timecode. Pyromusicals use this script type because a complete show can aligned with the music in a soundtrack. The Separate Scripts By Tracks method splits the script into multiple scripts that are triggered on demand by pressing the corresponding cue button on the Cobra controller. The Step By Tracks method is similar, but advances through the tracks of the show sequentially with the step button on the controller, instead of by random access. The Step By Events method advances one event at a time sequentially with the step button. Examples of all four script formats are provided in Table 4.See semi-automatic-firing for further instructions. |
| Tracks | The “Separate Scripts By Tracks” and “Step By Tracks” firing methods use the Track property in Finale 3D script rows to indicate the section of the show to which the row belongs. For Separate Scripts By Tracks the Track also indicates the button on the Cobra controller that triggers the section, which is in the Track value itself, a number 1-18 (please unhide the Track property in the script to use this feature). In Finale 3D, the Track field in the script table is hidden by default; unhide it from the blue gear menu. In the Cobra script file, sections are listed sequentially with a comment row and header row above the event rows, e.g.,
The number in the Track field in the Finale 3D script is the number in the #Track comment row, and also the second field (Trigger Button) in the header row. The sixth field in the header row for the script (“Opening” in the example above), is a track label. The rows in each section of a semi-automatic script have time values relative to the first event in the section, which is always time zero. In the Finale 3D script, please arrange the track sections in order, with no interwoven or overlapping events. |
| Track labels | Track labels were introduced in COBRA firmware V7.0 for “Separate Scripts By Tracks” shows to provide a readable label or note on the remote for the track/script. In Finale 3D, the Track field holds the track number and the track label together, as in “01 Opening” or “02 Middle Section”. The track number is the first number contained in the string, e.g., the number 1 in “01 Opening” or “Opening 01”. The track label is the string itself after skipping over any leading number in the string and trimming whitespace. For example, the track label of “01 Opening” is “Opening”; the track label of “Opening 01” is the same “Opening 01” because the string doesn’t begin with the number.
The best practice for representing track numbers and labels in the Track field in Finale 3D is to use a two digit number padded with a leading zero if necessary, followed by the track label. The reason for the two digits and for putting the number first is to make it possible to sort the script window in Finale 3D by the Track column numerically. |
| Step By Events | “Step By Event” scripts advance through the “Step Cues” manually as you press the STEP button. Each Step Cue consists of one or more events that are logically triggered together. For example, a pair of shells ignited at the same time are logically triggered together even if they are ignited by different pins or modules. A stack of different size shells ignited at the same time — and thus generally breaking at different times — are also part of the Step Cue.
The concept of events being logically triggered together also extends to events with the same effect times. A stack of different size shells ignited at different times but breaking at the same time are also part of the same Step Cue, because that is what you would expect. If events in a Step Cue have different ignition times, the Step Cue triggers the first immediately and incorporates a delay in the later events to preserve their relative ignition times. A stack of different size shells breaking at the same time thus generally fires the largest shell immediately and the smaller shells after delays that cause them to break at the same time. DMX events may also be included in Step Cues, on their own or combined with pyro events. Since a DMX effect represented by one row in the script table may require multiple DMX events in the exported script to control multiple DMX channels, all the DMX events associated with a row of the script table are necessarily part of the same Step Cue. In some cases, such as a DMX fixture with a color wheel or moving head, some of the DMX events associated with the effect must occur in advance of the visual appearance in order to turn the color wheel or move the head to the correct angle before turning on the fixture effect. Since the wheel turning or head moving can’t begin until the Step Cue has been triggered, the fixture effect may not be ready to turn on immediately, which manifests in a delay between when you press the STEP button and when the effect visually appears. Please see DMX setup events — preparing channels before the effect begins for more details. |
| Alternates | Cobra scripts provide for listing “Alternate1” and “Alternate2” events at the end of the script, and binding the events to buttons that can be pressed to trigger the events during or after the script. To use this function in Finale 3D, unhide the “Alternate” column in the script table window, and put the value “1” into script rows that you want to be “Alternate1” events; and the value “2” into script rows that you want to be “Alternate2” events. Finale 3D will include these events at the end of the exported script, and optionally double-list them in the body of the script depending on your choices in the Export Options dialog (See Table 3). |
| Disable groups | COBRA v7.0 and higher firmware recognizes the “Hazard” field of Finale 3D, which is exported as a text field identifying a class of events that can be disabled on the fly based on conditions during the show. |
| Pulse Time | COBRA v6.0 and higher firmware supports a user-defined pulse duration for which cue is to be energized. The pulse duration values in the exported script come from the durations of flames, lights, and other special effects. For more details on pulse duration, see Why is ‘Type’ so important? What depends on it? |
| Multi-hit pins | Used for non-pyro effects like flames and relays that can be triggered multiple times. Finale 3D handles multi-hit pins in the Cobra exporter the same as it handles single-hit pins — whatever pin address is in the script row in Finale 3D will be copied to the exported script row for Cobra, whether or not the pin address is unique. The standard pyro addressing functions in Finale 3D assign pins sequentially, so it may be easiest to address multi-hit pins in Finale 3D by editing the script table by hand and then locking the edited rows so the show can be re-addressed for pyro without affecting them. |
| DMX | COBRA v6.0 and higher firmware with 36M and 72M modules supports DMX output for separate or shared DMX universes on each module. |
| DMX Safety Channels Across Tracks | The “Separate Scripts By Tracks” script type requires safety channel events for all relevant fixtures at the beginning of each track; the other script types only require safety channel events at the beginning of the show, applying to the full show. 1) “Separate Scripts By Tracks”: All DMX channels including safety channels reset to 0 at the beginning of each track; every track requires safety channel events for all fixtures. 2) “Step By Tracks”: All DMX channels including safety channels are unaffected by track changes; safety channel events for fixtures in the first track apply for the entire show. 3) “Step By Events”: Safety channel events for fixtures apply for the entire show. 4) “Standard Script”: Safety channel events for fixtures apply for the entire show. |
| DMX Ramp-From Value | COBRA v7.2 and above support the “DMX Ramp-From Value” field which specifies the interpolation start value for a DMX channel. This feature supports fades and color blends for light fixtures, and more controllable movement for moving head fixtures. |
| Track DMX Latency Option | (Advanced option) To reduce the delay from when you press the trigger button and when a track begins you may want to limit the “setup time” for DMX events. Events for moving head fixtures and color wheel fixtures set the angle or color wheel parameter prior to the effect by as much as a 1000ms to ensure the angle or color wheel is in the proper position at the time the effect becomes visible. If such an event is the first event in a track, then the track’s start time will be 1000ms before the effect becomes visible, which is a long latency if you want the track to begin immediately when you press the button!
If your show is sensitive to this latency, you can set the Per-Show Setting maxInitialDmxSetupDelayMs to whatever maximum number of milliseconds you are willing to allow the fixture for its setup time for any DMX events. You can set the setting to any integer, but 100 is the recommended minimum value to avoid potential problems with fixtures that require channels to be set in a specific order. |
When you export a firing script for Cobra, Finale 3D presents an “Export Options” dialog with options that go into the header of the exported script or affect the format. The choices are shown in Table 3.
Table 3 – Export options
| Option name | Description |
|---|---|
| Version | Choose the script format that matches your firmware version, v3.X – v7.X. The version affects the number of columns in the exported script, the time resolution, and various capabilities. Version v6.0 is the first version to support DMX. |
| Script Type | Choose one of the four script types: Standard Script, Step By Events, Separate Scripts By Tracks, and Step By Tracks. |
| Script Filename | Firmware v5.0.X or lower: Filename must be exactly “cobra.csv”. Firmware v5.1.X: Custom filenames allowed up to 42 characters including “.csv”. Firmware v6.X or higher: Custom filenames allowed up to 32 characters including “.csv”. |
| Use Cobra Audio Box | Select ‘Yes’ if you plan to shoot your show using the Cobra Audio Box, otherwise select ‘No’. |
| Audio Box Filename | This corresponds to the filename of the MP3 soundtrack that you plan to load into the Cobra Audio Box.
The name that you specify here will be added to the header in the script file and must match exactly to the filename of the soundtrack that you load into the Audio Box. For example, if you specify “audiobox.mp3” in the script export options dialog, then the filename of the soundtrack that you load into the Audio Box must be “audiobox.mp3”. If the Audio Box filename in your script and your soundtrack filename don’t match, your show will not fire. In COBRA firmware v3.X and 4.X, the Audio Box filename must be “audiobox.mp3” and is not editable. |
| SMPTE Timecode | (COBRA v5.1 and higher) Select among three timecode choices: None, Timecode 1, and Timecode 2. This choice merely fills into the header of the exported script. The choice does not affect any other timecode related features, including the exported soundtrack.
Timecode 1 – The 18R2 will continue to fire even if the timecode is lost or the quality is too poor. Timecode 2 – The 18R2 will stop firing if the timecode is lost or the quality is too poor. If the timecode stops, fast forwards, or is rewound, the 18R2 will keep in sync with the timing. |
| Trigger Channel | Choose the channel that the 18R2 remote needs to be on as a precondition for the user to initiate this script: 0-99, or the option “None”. The option “None” indicates no specific channel is required as a precondition for initiating this script. |
| Return Channel | Choose the channel that the 18R2 remote returns to automatically upon completion of the script, 1-18 or “None”. |
| Trigger Button | Subject to the Trigger Channel precondition, the Trigger Button is the button on the 18R2 remote that triggers the script, 1-18, or the STEP button, or the AUTOFIRE button.
If you choose the script type Separate Scripts By Tracks, then the Track field in Finale 3D that groups together sections of the show into separately triggered scripts on the 18R2 also specifies the Trigger Buttons for the separate scripts as being the Track numbers. |
| Deadman Button / Trigger Confirmation Button | Choose “None” or optionally a button 1-18 or “Deadman” as a confirmation button for triggering the script. The choice cannot be the same as the Trigger Button. |
| Disable Firing Button | Choose “None” or optionally a button 1-18 to disable firing during a show. |
| Alternate 1 Button | Choose the button associated with “Alternate 1” script events (see “Alternates” in Table 2). |
| Alternate 2 Button | Choose the button associated with “Alternate 2” script events (see “Alternates” in Table 2). |
| Exclude alternates from script body | Choose whether alternates are double listed in the body of the script (see “Alternates” in Table 2). |
| First event of Step By Events scripts fires when script starts | Choose whether Step By Events scripts, when triggered, require pressing the STEP button for the first event or whether the first event fires immediately when the script is triggered. This option is typically not checked unless if you choose the STEP button as the Trigger Button for the script, in which case it is a matter of personal preference. The option only affects Step By Events type scripts. |
| Sampling rate for continuously changing parameters | Determines the number of script events generated per second for DMX effects that change smoothly over time, known as ramps. A ramp is a gradual change in a DMX channel’s value—such as a fade, color transition, or moving-head motion—rather than an instant jump. A setting of 10 Hz (recommended) means Finale 3D creates 10 script events per second to represent a ramp, producing smooth results without greatly increasing the script size.
This setting applies to Cobra firmware v7.1 and earlier. Starting in v7.2 and later, each ramp is represented by a single script event. For example, at a 10 Hz sample rate, a 1-second ramp that required 10 lines of script in v7.1 and earlier now requires only 1 line. |
After the header, each row in the script has a number of fields separated by the vertical bar character. The names of these fields and their descriptions are shown in Table 4.
Table 4 – Specifications of script fields
| Column in Excel | Field name | Description |
|---|---|---|
| A | Event Time | Ignition time of the event, in the format: 00:00:01.00s. |
| B | Channel | Channel number (same as the Module Number and Rail Address), in the format: channel 10. (Blank for DMX rows.) |
| C | Cue | Cue number (same as the Pin Address), in the format: cue 1. (Blank for DMX rows.) |
| D | Name | Effect name, followed by the part number in curly braces (COBRA v6.0 and higher; non-DMX effects only), followed by double-slash and the name of the position or positions, followed by double-dash and the DMX channel label and channel offset in parentheses if event is a DMX event. If the name contains a fixture ID / effect ID annotation in the format “[xxx/yyyy]” the fixture ID will be removed since it is redundant with the name of the fixture that is typically also in the name. The value is a text string, at most 62 characters long.
PYRO EXAMPLE: DMX EXAMPLE: The DMX example’s effect originally had a fixture ID / effect ID annotation of “[005/1096]” but the fixture ID “005/” was removed from the exported name. |
| E | Disable Groups | (COBRA v7.0 and higher) Text string identifying a group of events that can be disabled on the fly based on conditions during the show. |
| F | Pulse Time | (COBRA v6.0 and higher) Duration for which cue is to be energized, in floating point format (0.01 second resolution); or blank for the default duration. Finale 3D writes the empty string value, unless the cue contains an event of type sfx, flame, light, or not_an_effect, in which case Finale 3D writes the duration of the event as shown in the script row. See Why is ‘Type’ so important? What depends on it?. |
| G | DMX Ramp-From Value | (COBRA v7.2 and higher) Blank for no function, or an integer from 0-255 specifying the “from” value for the DMX channel to interpolate from over the DMX Duration (Column K); the DMX Channel Value (Column J) is the “to” value. The channel value will remain with the “to” value indefinitely after the duration until set to another value by another event. |
| H | DMX Universe | (COBRA v6.0 and higher) Integer from 1-100, identifying the DMX universe. (Blank for non-DMX rows.) |
| I | DMX Channel | (COBRA v6.0 and higher) Integer from 1-512 identifying the DMX channel of the row. (Blank for non-DMX rows.) NOTE: as of 4/2/2021 Cobra hardware is limited to 200 channels, 1-200. |
| J | DMX Channel Value | (COBRA v6.0 and higher) Integer from 0-255 identifying the value for the DMX channel. (Blank for non-DMX rows.) |
| K | DMX Duration | (COBRA v6.0 and higher) Duration of DMX command, or blank to leave the DMX channel value as is until a subsequent script row for the same channel changes the value. The length of time can be between 0 seconds and 10 minutes at a resolution of 1/100th second. The format is MM:SS.XX. For example, 1 minute, 10.3 seconds is 01:10.30. For COBRA v7.2 and higher, the DMX duration defines the period over which the DMX channel value interpolates from the DMX Ramp-From Value (Column G) to the DMX Channel Value (Column J) if the ramp-from value is not blank. This field should be blank for non-DMX rows. |
An example semi-automatic script with two sections is shown below. The first track section contains two events with disable groups (wind, rain), and a third event with an explicit pulse duration.
##version 6
#Track 1
0,1,,0,audiobox
00:00:00.00s,channel 1,cue 1,White Chrysanthemum {G2SH1000},wind,
00:00:02.90s,channel 2,cue 1,White Chrysanthemum {G2SH1000},rain,
00:00:05.40s,channel 2,cue 4,Long Flame Projector Shot {GXX1101},,0.41
#Track 2
0,2,,0,audiobox
00:00:00.00s,channel 5,cue 1,Green Chrysanthemum {G2SH1001},,
00:00:01.00s,channel 6,cue 1,Green Chrysanthemum {G2SH1001},,
00:00:02.00s,channel 7,cue 1,Green Chrysanthemum {G2SH1001},,
00:00:03.00s,channel 8,cue 1,Green Chrysanthemum {G2SH1001},,
end
Figure 2 – Example Cobra script
Table 5 – Example files
| Download link | Explanation |
| test_cobra.fin | Example show |
| test_cobra_standard_script.csv | Example exported standard script (fully-automatic) |
| test_cobra_separate_scripts_by_tracks.csv | Example exported semi-automatic script (separate scripts by tracks) |
| test_cobra_step_script_by_tracks.csv | Example exported step by tracks |
| test_cobra_step_script_by_events.csv | Example exported step by events |
| magicfx_cobra_standard.fin | Example DMX show using MagicFX flame projector |
| magicfx_cobra_standard.csv | Example exported DMX script using MagicFX flame projector |